Showing posts with label Gardening. Show all posts

Strawberries - A Success Story

After my last gardening post, I mentioned that was one crop that didn't appear to be a total failure.  Of course, part of the reason for that is probably because it's crop was the result of work from previous years, not this past year's. 

That crop is the strawberry.
 

We planted these strawberry plants three (or four???) years ago.  I carefully followed the planting instructions and then diligently plucked little white and yellow flower and little white and yellow flower as the sprouted, delaying strawberry satisfaction but ensuring that the plants would get strong enough for a nice crop the following year. 

The "following year" the crop was only so-so.  I'm not sure what went wrong.  Perhaps nothing. But the harvest was minimal at best, and we struggled with slugs like crazy. 

This year, we have a nice lush bed of strawberry plants.


Better yet, they are actually producing decent strawberries!!!!


One crop is a June bearing variety, and the other is an "everbearing" variety.  The June bearers are definitely a nicer, larger berry, but they only produce one - maybe two - crops per year and then are done.  The evebearers, on the other hand, keep producing throughout the summer but the berries are smaller, not as nicely shaped and later in the season sometimes don't taste quite as good.  If I was to do this garden again, I would go with a June bearing and a July or August bearing - that way, I think I'd get decent sized crops of nice looking berries but not all at once.


Each container holds about a pound of strawberries.  I'd say that I got about 10 pounds in total this year.  That was a LOT of berries, especially considering that I don't eat them. 


DH got to have a lot of fruit salad the past few weeks, and he loved it.  The crazy thing is that with berries being in season right now, strawberries are actually super cheap at the grocery store - as cheap as $2.50 a pound. So assuming that we got 10 pounds at that price, we're really only saving $25 a year by growing our own.

Even I think these look tasty!!!

But that's not really the point of having a garden, is it?  I've known since the first year that this garden was going to be a hobby, an investment of sorts, with more or less no guarantee of return.  In that case, any return should be considered a success, and the strawberries definitely get the "student of the year" award so far for this garden!

Garden 2011

Garden 2011 is in full swing, although I certainly got a late start on it this year.  The pregnancy is not the blame - it's the busy-ness of life.  But of course, the pregnancy has created most of the busy-ness (how do you spell that word?? I feel like I'm just making up a spelling..) then I guess we should just blame the pregnancy after all.

Like I mentioned, I got a really late start on this garden. For that reason, I don't think it's going to be as successful as last year's, which is sort of sad.  I like to always keep improving, not taking steps backwards.  This post will mostly reflect on the mistakes I've made, which I hope to use as notes for next year.

1. Mistake #1 - I planted the leafy vegetables too late


I bought a pack of 4 spinach plants and 3 romaine lettuce plants (to get an early crop) as well as seeds for leaf lettuce, spinach, and chard.  You might recall that last year, chard was one of my favorite crops of the season.  But I didn't get the plants into OR the seeds into the ground early enough.  I think it was the last week of May before I did this, and then all of a sudden it got hot out.  Leafy greens are cold weather veggies, and the fact that we had such a rainy, cool spring is like a double fail for me - I think I could have had an amazing crop if I had gotten these into the ground by the first week of May.

As it stands, I'm not sure that I'll have any leafy greens to harvest this year.  Huge sad face.

Mistake #2 - I picked up the wrong tomato plants


We like Roma tomatoes.  You know, the small, ovular shaped tomatoes, also known as "plum" tomatoes.  Last year our two Roma plants produced more tomatoes that we could keep up with (actually, we did keep up with them, but it was a challenge!)

This year I went to Home Depot, found the Roma section, picked one up and was on my merry way. Only to find when I arrived home that the plants I picked were NOT in the correct section at all, and now I had four "big boy" tomato plants on my hands.  I was all ready to plant them, so I didn't want to take them back.  They're in the ground, and seem to be doing fairly well but I'm not sure what I think about "big boy" tomatoes.  The large plant in the middle was from one of DH's students.  I think it's a cherry tomato plant, which I am kind of excited about.  

Only a medium fail on the tomato plants.

Mistake #3 - I don't think I have the proper support structure in place for Snap Peas


Sugar snap peas are a new veggie I'm trying this year.  I decided to plant it after making chicken lo mein all winter long and enjoying the stir fried green little veggies. (I also looked into whether or not I could grow water chestnuts, but did you know you actually need a pool of water to grow those!?!?) 

Anyway, I don't know much about peas, other that the package said "provide proper support."  I have no idea what proper support is, but I used the fencing that I had from last year, which we used to let the cukes climb on.  Even after only a few days, the pea plants are already going over the fencing.  Clearly I need more support. 

Mistake #4 - I forgot to order potatoes in advance


Last year I ordered my potato spuds very early on with the rest of my garden order in the spring.  This year I forgot to add the potatoes.  When I went to order them, I realized that shipping is like $12 no matter how big your order.  For $10 plants, that seemed outrageous.  So I decided to give the Home Depot potato plants a shot.  Even though they looked ridiculous before going into the ground (they were indoors and reaching like crazy to try to find sunlight) so far, the majority of them seem to be thriving.  These were slightly cheaper than the nursery potatoes, so if they thrive and taste good this might not be a fail after all!!!!

I also planted cucumbers, but as of yet, don't think I messed anything up with them (fingers crossed.)  But the way this garden has gone this year, it will probably be the year of "weird and random cucumber disease" that destroys all of the crops.  That would just be my luck.

The next gardening post will spotlight the one single success that I've had this year, and it's a beauty.

Mums mean fall

I used to love fall.  In fact, back in the day, I would quite confidently tell you that fall was my favorite season.  I liked wearing sweaters and jeans, and appreciate the generally clear skies and cool weather.

But now I live in the country and fall means raking leaves, digging up the garden, and wrapping arborvitaes in deer block mesh stuff.  It means work.  On top of that, after last winter - the worst winter ever - I am not ready for another winter.  Fall means impending winter, thus another strike against fall.

Spring is now officially my new favorite season.


But it's fall and there's not much I can do about it.  So I decided to brighten up my fall just a little with a beautiful bright mum. 


It's bright and pink and blooming like a beautiful spring flower!  And even though mums mean fall, fall becomes a little easier to tolerate when I have something like on my porch.

I love mums... but that doesn't mean that I love fall.  Spring - I hope you come back soon!

The Apple Orchard

As if I didn't already have enough on my plate with the garden, Mother Nature just dropped a bomb on me.  Literally.

You see this tree?

Stupid tree....
We've lived here for three years now, and we always thought that tree was a crab apple tree.  The apples were very crab apple-ish, small, bumpy and unappealing looking.  I hated this tree - still hate it really - and two years ago when there was a chainsaw lying around, I begged for it to be cut down.  But DH refused, and after giving this tree some TLC in the form of some fresh mulch this spring, it started producing crab apples on steroids.  Seriously large crab apples.

We ignored them for most of the summer.  Our yard is mostly a dust bowl, and when it's not a dust bowl it's mostly tall, stupid weeds, so we don't have to mow much.  Thus, the apples could sit there - hiding in the weeds - without us really noticing them at all.

Then came this weekend, and DH decided to mow.  He asked me to pick up apples, and I started digging through the weeds/dust bowl and picking them up.

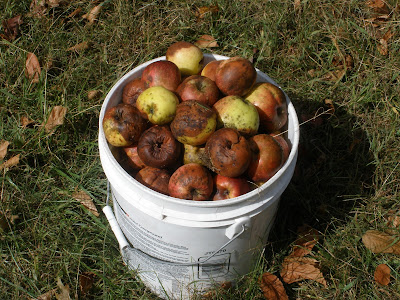
"I'm going to get you a bucket," he said, and I didn't argue, since I already had an arm full of apples and they were rotting and disgusting so I didn't actually want to hold them close to me.

But about two minutes after I started putting apples in the bucket, it was full.

Ewww....
Why?  Because these apples were as crab-apple-shaped as I had originally though.

So then I got to thinking, "How many apples are there down here?"  And I went and got our wheelbarrow to find out.

Well, it turns out there were a lot of apples.  A lot of apples that are definitely not crab apples.

These were all laying in our yard! At the bottom of the hill!!!
Apparently we have an apple tree in our yard.  An apple tree that produces some seriously nasty looking apples.

In the interest of science, I kept some of the best looking apples and brought them inside to conduct some internet research and experiments on them.   My research has led me to believe that these apples are diseased with not one, but two diseases - sooty blotch and flyspeck.

A non-crab-apple with sooty blotch
But the prognosis isn't as grim as one might think.  Both sooty blotch and flyspeck are caused by a fungus, usually from your soil or from the tree, which is no surprise to us since we have already learned that our soil is wildly fungus infected by the amount of massive mushrooms that grow each year.  You can treat it with fungicides in the spring, right after the flower bloom and fall off, but neither disease really affects the taste of the apple in any way.  In fact, I peeled one of these apples, fed it to DH, and he said that it tasted great.

Comparing these apples to dozens of pictures of other apples, my best guess is that they are of the Braeburn apple variety, but obviously that is just a guess.

So now, in addition to the garden, are we seriously going to have a mini-apple orchard as well?  It would be a dream for the grocery budget - produce is where we spend the most money - but do I really want more gardening work?  And can we really rehabilitate this tree?

Only time will tell....

Dormant plants - Follow up and Review

Remember the dormant plants that I received early in the spring? They didn't look too promising at the time.  And to be completely honest, a lot of them didn't grow.  But the ones that did have done surprisingly well, and have me reconsidering my decision to purchase well-established plants at outrageous prices from places like Home Depot.

Here is what the Rose of Sharon plants looked like in the spring:

Twigs, that will supposedly transform into beautiful Rose of Sharon hedges


And here is what one of them looks like now:

The actual transformation - Not too shabby!

They are, in fact, rivaling the RoS that I purchased three years ago, that looks like this.


Two others in this garden area are similarly thriving. One is planted in another, less sunny location, and isn't doing as well.  So two were lost out of a total of 6.  Not bad, overall.

The hibiscus plants were what I was most excited about.  In fact, originally I wanted out backyard garden to be completely full of hibiscus plants.  If you recall, the hibiscus plants were just dirty looking roots in dormant form.

The are the rooty-looking things at the top, between the two pine-looking things

Now, the one that has flourished the most looks like this:

It's even flowering!!!


Two of the other hibiscus plants are growing nicely, although they aren't nearly as huge as this one.  A fourth one, planting away from the other five and in an area that doesn't get as much sun (like the Rose of Sharon mentioned above) is alive but not thriving nearly as much.  Sun counts, people.

The other plants that really did well were the lilies, and the purple things that I think are called Blazing Liatris.

Other plants are hanging in there, but certainly aren't flourishing by any means.  The lily of the valley, gardenias, creeping phlox, and purple ice plant are dead... yet.  But I don't have much faith that they'll make it through the winter.

Finally, the list of things that just never even had a chance.  For some reason, these plants never came out of their dormant stage, or did momentarily and then just died.  If I can track down my packing slip from this order, I will definitely be calling in the warranty on these plants, including:
- Black eyed susans (never came up at all)
- Arborvitae trees (all died)
- Blue spruce (all died)
- Candytuft (never came up at all)
- Blue oat grass (never came up at all)
- Pink dogwood (thrived for about a month, and then just randomly died)

So, I can say with certainty that I will never order any of the things on the list above ever again, and will stick to purchasing these plants in established form from Home Depot.  I also probably won't order any dormant versions of the "just hanging in there" list either.

However, I can - and will - recommend the following items, based on my relative success:
1. Red potatoes
2. Rose of Sharon hedges
3. Hibiscus
4. Mixed hybrid lilies
5. Blazing liatris

If you need of those plants, you can get amazing deals by buying them in a dormant state. All of my plants were purchased from Four Season's Nurseries.  They do have a warranty for things that don't make it, but you need to be better than me in keeping track of packing slips.

And just for fun, do you remember this picture I created as my inspiration for what I wanted this garden to look like??


Well, it now looks like this.


Not quite the look I was going for...  But we're thinking of getting new mulch next year, the triple-shred black-dyed stuff so that it doesn't fade in the sun as quickly as this stuff did.  We don't really have grass - it's more like a wheat field - so the brown mulch doesn't really stand out in our yard.

But I think that next year will be THE year for this garden.

Holy Tomatoes

I know that I've mentioned the tomatoes in other posts, but have I REALLY told you about the tomatoes?  I don't think I have..

We started with two tiny $4 tomato plants from the Home Depot.  Roma variety, plum shaped. I don't even really care for tomatoes all that much, but I LOVE how the plants smell.  So I plant them.

Two plants!!!


We put these these plant sin tomato cages, but they quickly outgrew them and were drooping and snapping from the weight of all of the tomatoes.  We then had to go out and buy the triangle tomato fencing to encircle the original cage.  I delicately pulled the stems off of the ground while DH put the fence into place, and then we carefully rested the stems onto the fence.  It was like open-heart surgery or something similarly intricate.

Falling over from the weight of the tomatoes


You hear and read a lot of things about tomato plants that supposedly make them grow better.  Coffee grounds, eggshells, and other totally absurd-sounding things.  I can tell you that I did none of those things this year, and other than a truckload of manure, none of my plants received any supplemental nutrition. 

And my general non-love of tomatoes? Well, I quickly devised dozens of ways to use them in our recipes, and now I'm a huge fan of fresh tomatoes, although I still don't really like to eat them in their raw form.  But cook them up and I'm all in.  And if you don't believe, look at 95% of my recipes that I've posted this season - I swear they all involve tomatoes.

Garden Fresh Recipes - Pesto

My basil crop was nearing the end of it's life, and sadly, this year was not my best year for basil.  The tomato plants grew to be so large that they basically knocked the basil plants over.  They didn't completely die, but the back sides of them received literally zero sunlight and so only the fronts and tops of the plants really did well. Even then, it just wasn't their year.  I bought a basil plant for my mom and aunt to share, and when I saw my aunt's plant back in July, it looked way better than mine ever did.

Regardless, I was ready to start pulling things out of the garden, so I yanked two entire plants and pulled off any usable leaves to make pesto.  I borrowed my sister's combination food processor and blender and it worked great.  I have already told her that I would like one for Christmas.  Sister - please don't forget.

So without further ado, my pesto recipe.

Basil Pesto

1/2 pine nuts or walnuts
3 cloves of garlic (or, a healthy couple of shakes of garlic powder)
4 cups of loosely packed basil leaves
1/2 to 3/4 cup of extra virgin olive oil (start with 1/2, add more if needed)
1/4 cup Parmesan cheese

Add all of the above ingredients into your food processor, in the order listed above.  When adding the olive oil, pour it over all of the basil leaves.


Once everything has been added it should look like this:


Then, turn on the food processor and process the living s#&! out of it.  That's the best way to describe it.  You'll know when it's right.

It'll look something like this

If necessary, stop halfway through and use a spatula to scrape things off of the side.  Also, this would be the time to add more olive oil if it's too pasty.

Voila!

If you're not going to use it right away, put it in tiny containers (there are some really cute Gladware condiment sized things that are the perfect size), then into a plastic freezer bag, and freeze it.  It will stay good for at least a year, maybe even more if it doesn't freezer burn.

We often eat this with pasta, but I have found that my favorite way to enjoy pesto is on a thick slice of Italian bread, warmed in the oven, covered in pesto and then topped off with a little garlic salt.  Yuuumm....


My final two cents: 
Pesto is really flexible.  The recipe above just happens to be what I use, but if you don't have garlic, skip it. If you don't like Parmesan cheese, skip it.  If you like more olive oil, add more!  Seriously, all of you really need for pesto is EVOO and basil.  A lot of recipes that I've seen use parsley to brighten up the green color without really affecting flavor, but I'm OK with it looking a little brown as long as it tastes good!

I Heart Potatoes

Each year I have a "favorite" crop from my garden.  My first year it was basil, mostly because that's the only thing that really grew.  Last year, it was green beans, when I realized how hardy and productive they were.  This year, without a doubt, my favorite crop is the red potato.

If you recall, from my earlier posts about the potatoes, the seed spuds starting out like this.


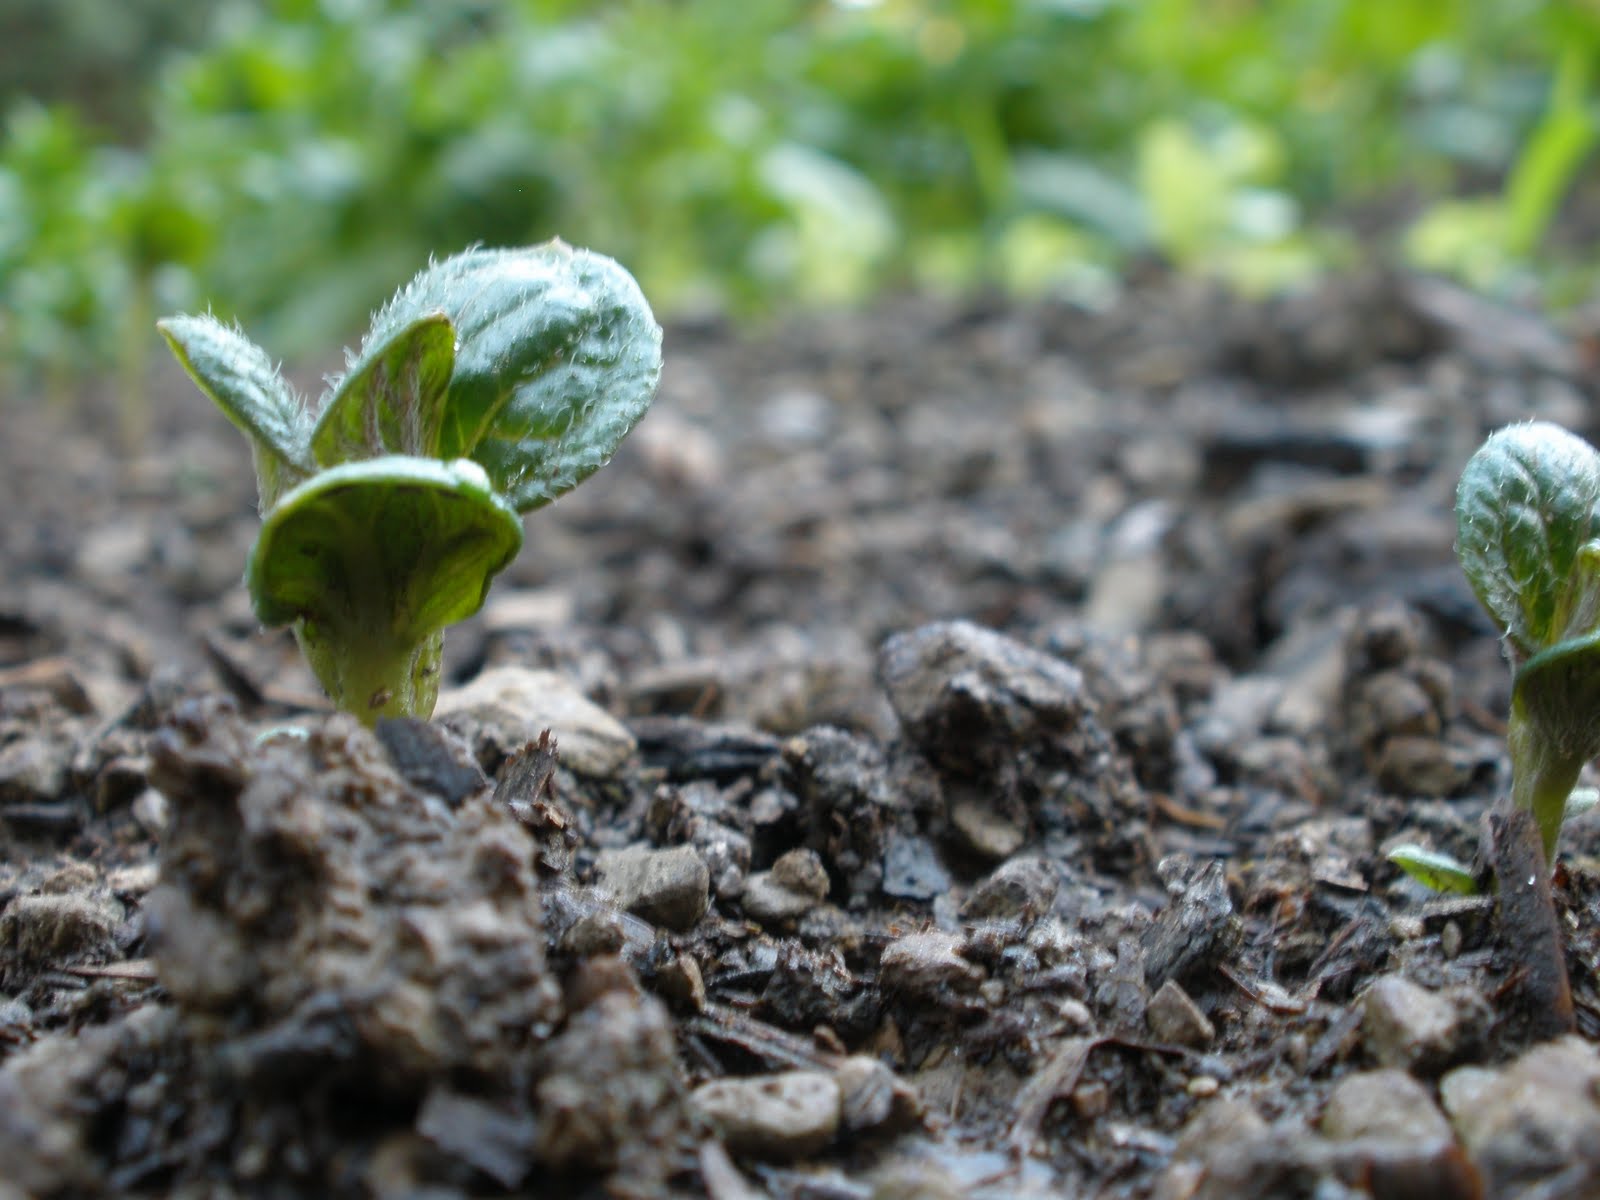
Then they started sprouting, and I was thrilled!


The plants grew like crazy and filled the entire section of the garden.

Yes, those are all potato plants

But recently they started dying back, and I knew it was time to start digging to see whether or not anything productive had been going on underneath all of that soil.  That's the crazy thing about potatoes - you have absolutely NO IDEA if the potatoes are actually growing or not, because it all happens underground.  This being my first tuber vegetable, I found it to be highly frustrating. 

So you can imagine how thrilled I was when after less than 5 seconds of pushing away dirt with my hands, I uncovered this:

Eeeeekk!!!
And a close-up
I proceeded to uncover as many potatoes as I could find with my hands, and then used a pointy garden tool that I think it used for loosening the roots of weeds to get underneath the potato without damaging it and popping it up out of the soil.  No digging required.  It was awesome.

Before "popping"
Once they were all loosened, I just grabbed the stalks of the plant and pulled. 

Love! :o)

I pulled about 5 or 6 plants today, and most of them averaged about 4 potatoes were plant.  One particularly sad looking plant only produced on tiny, measly potato.  Oh well, guess you can't win them all.

Originally I was thinking about harvesting all of the potatoes in one day, but when I noticed that many of them seemed to be somewhat underdeveloped so I stopped after those first 5 or 6 plants. 

When I was done, I had a nice looking bowl of potatoes. 

See the really tiny ones? I wish I could have left them in the ground longer...
I still have another 12 or so plants to harvest, and I decided to leave the ones with the healthiest looking plants up there for another week or so, and only pulled the ones that had dying plants.  Overall, I am thrilled with the success of these potatoes and I will definitely do them again last year.  They did attract a LOT of new bugs to the garden that I have never seen before and I will need to look into potato pests in greater depth in the future, but they didn't seem to affect the potatoes themselves, as there were no visual holes or anything.

In case you're wondering, the spuds were purchased from Four Season's Nursery, the same site where I purchased my dormant plants.  I will be reviewing them in another post where I talk about the successes and failures of the dormant plants, but I would most definitely purchase their potato seeds again (and trust me, they are not compensating me in any way for saying that.)

I gave my sister one of the potatoes already, and DH and I will be using them on Tuesday for a dinner or meatloaf and mashed potatoes.  So although I can't yet comment on their taste, I can't wait to try them!

Garden = Nearly Done

Well, the gardening is more or less done at this point.  It went from looking like this:
Lush and Green
 To looking like this:

Wilting and yellow
All that's really left are a few tomatoes and the potatoes, which I started harvesting this past weekend.  I had toyed around with the idea of planting a second round of a handful of crops, but decided against it.  This years garden was exhausting - part of that was due to the fact that for the first time ever, it was successful, and I didn't know how to deal with that.  Success is more work than failure.   Yep, that was my light bulb moment.

But it's SO true!  Last year, when a crop starting dying, I just ignored it and let it die.  This year, not only did I have to put in the extra work of harvesting the successful crops, I had to work ever harder to give them away so that they wouldn't go to waste!  There was no way that DH and I could eat 25 cucumbers! No way that we could eat 100+ tomatoes.  The only really reasonable thing that I did this year was plant less green beans, and so I only gave away a handful of those.  But I also wasted many of those, because they were ready to pick right during the week that we were on vacation in Mexico, and by the time I got back, they were already enormous.

So, I spent a lot of time on the garden today, and I have a lot of updates, including my most exciting harvest of the summer - the potatoes!  This week will likely be full of garden posts. Consider yourself warned.

Garden Fresh Recipe - Mojitos from Mexico

Can mojitos really be considered a garden fresh recipe? 

 Mint from my garden

Well, if you're making them from scratch based on a recipe that you got from a Mexican bartender and using mint that you grew yourself, I think that's a recipe!!!  Agree?


Early in the summer I wasn't very brave, and just use the pre-mixed Bacardi brand raspberry mojito stuff.  I added some of the Giant Eagle brand raspberry carbonated water, because I don't like strong drinks.  I added a sprig of fresh mint which I bruised with my straw (to bring out the flavor).  They were certainly yummy, but that Bacardi stuff is expensive.
 

Then, when we were in Mexico I started ordering mojitos.  They were SO. DELICIOUS.  One afternoon, after a couple of hours by the pool bar (DH ordering waters, of course) I observed the bartender making the mojitos and decided that I would try it myself.

Mexican Mojitos

Ingredients:
  • Limes (at least one or two)
  • Simple syrup
  • Club soda (soda water)
  • Mint leaves
  • Ice
  • White rum

First, you need to make simple syrup.  To do this:
1. Microwave 1/2 cup of water in the microwave in a glass mixing cup until it's boiling
2. Add 1 cup of sugar and stir until it's all dissolved and it's clear
3. Refrigerator until it's cool

The simple syrup might have a yellowish hue to it.  Don't worry about that, it doesn't affect the flavor!

Once the syrup is cooled, you can make the actual mojito.  My measurements are very imprecise - basically make a half glass of one, taste it, and then add more of whatever it's lacking! But the general recipe is this.

1. Cut a lime wedge into about 8 wedges.
2. Squeeze the juice of 3 or 4 wedges into a glass and throw in the rind and pulp.
3. Add a generous amount of mint leaves (at least 8 or so, if you like mint)
4. Add a splash of simple syrup.  If you like your mojitos sweet, I would suggest starting with one tablespoon and going from there.
5. Using a spoon, mash it all together in the bottom of the glass.


6. Fill the glass with ice.
7. Add one ounce of the white rum (or more, if you like your drink with a kick.)
8. Fill the rest of the glass with soda water.
9. Squeeze another lime wedge onto the top of the drink, use the wedge as garnish, and then add another mint sprig!


Stir it with a straw or spoon before drinking so that the limey, sweet, minty goodness from the bottom mixes with the club soda and rum. Otherwise, it will taste gross on your first drink!


SO GOOD!

I will admit that it took some experimenting to get to the point of the perfect mojito. I used a much bigger glass than they did in Mexico, so my proportions were off. 

Also, keep in the mind that the simple syrup is ridiculously sweet.  I used a little to much the first time around and it was way sweeter than I wanted. 

If you are a fan of mojitos or are even just interested in trying one, I highly recommend making your own!

Garden Fresh Recipes - Hawaiian Chicken Kabobs

Hawaiian chicken kabobs are one of DH's favorite meals.  He loves the grilled pineapple aspect of it, but I was excited to make them this year because it was the first year that I was growing peppers!!!

I had two pepper plants - one orange and one red.  Both of them were doing amazing, but then we had some really heavy rain and a bunch of the peppers fell off and got all soggy.  THEN I noticed that two of the remaining four peppers had holes in them and were rotting.  So I kept an eye on the final two peppers and when I started to fear that they might go bad, I picked them.

Sadly, one of them had already started to rot, so I threw it away, leaving me with only 1 good pepper out of the 6 that I originally started with. VERY sad....


Anyway, here's the recipe - this is VERY easy and quick!

Hawaiian Chicken Kabobs

Ingredients:
1/2 to 3/4 pound chicken
1 medium sized red pepper
1 can pineapple chunks
1 packet of McCormick Hawaiian Luau marinade (need oil and vinegar for this)
Grilling skewers


1. Mix marinade and soak your skewer in water so that they don't burn.  Set aside about 3 tablespoon of the marinade for basting later on.
2. Cut your chicken into chunks and put in the marinade. Refrigerate.
3. Cut the pepper into 1 inch squares.
4. Once the chicken has marinated long enough to suite your tastes, start adding the three ingredients. 


Chicken, pepper, pineapple and repeat

A close-up of the finished product

Goes well with garlic bread, heated on the grill!

Throw them on the grill for about 8 minutes, flipping them once with tongs halfway through.


Enjoy!!!


My two cents:
1. Use pineapple CHUNKS not tidbits.  Tidbits are too small and fall off too easily.
2. The weird colored pepper tasted great - do not listen to your husband when he says that he's afraid of a multi-colored pepper that had a little water in it!